Tuesday, 12 January 2016

July 565AD, Part 2

Another game of Dux B, and another raid on the beleaguered of Alt Clut, this time by some Scotti.
 
Having heard that there were no cattle left in the kingdom they had obviously decided to try something else and were raiding a church instead.

Church
The church in question was half way up the table on the left hand side, while the British would appearing on the opposite side of the table form the church. The Scotti got 2 turns of movement before the British arrived, but this was reduced to 1 by the recently constructed watchtowers.
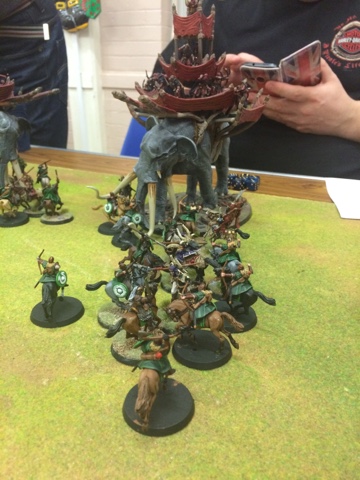
Smelly Scotti


Valiant and Brave British

Early game was quite quiet, with the Raiders advancing up the board towards the church, while the British swung their infantry wound behind the Scotti to cut of their escape, while the cavalry headed up the board to deal with the mounted Scotti.

Lots of smelly Scotti
The Scotti decided to send their Skirmishers to look for the loot in the church, but they were obviously not to happy at this as their dice rolls for movement were pretty rubbish. The main band of raiders on foot advanced towards the church, keeping one eye on the British to their right and rear.

British Shock cavalry try to get their chance


Missed it! Now done over by Scotti cavalry

At the top of the table the cavalry were also squaring off. My shock cavalry have to get the charge to be any good and the combination of movement roles always seemed to put them too far away to get a decent chance of contacting the enemy cavalry.  Ian managed to position his cavalry on my flank and then it all came down to whose cavalry got to activate first, and of course it was the Scotti, who assaulted my first unit of Shock Cavalry with  his Noble Raiders, accompanied with his general in a chariot.  I came out of it badly losing half the force and the rest retiring due to excess shock, but at least my Elite Shock cavalry had a chance to do something now.

More valiant and brave British
In the middle of the field not much was happening. The Scotti skirmishers were making some half hearted efforts to find the treasure, while the Raider infantry just milled around in the middle of the board waiting for something to happen. The rest of the British infantry had all joined up into one large Shieldwall and were manoeuvring into a position to cut of the Scotti escape.  I finally got the chance to charge into the Scotti cavalry with my Elite shock cavalry, but unfortunately I had to cross a wall, which unhorsed half of them.  Not to worry, they get double dice on the charge.  Which apparently means that you will get twice as many misses, and in two rounds of combat my elites managed to miss with every attack (that's about 12 dice, none rolling above 4) and were wiped out for their trouble.
 
With the British cavalry all but eliminated attention was drawn to the centre of the battle, where the Scotti gave up looking for loot and came out to fight.  There was a large Mexican stand-off in the middle of the board as the Raiders appeared reluctant to engage the British Shieldwall. 

Shieldwall!


Stop hanging about and get on with it!

After some goading Ian finally had a go, and after some fighting there was no clear winner. there were no British casualties thanks to Shieldwall, but a lot of shock, while there was quite a bit of shock and some casualties on the Scotti side.
 
Meanwhile my remaining cavalry had transferred to the other side of the table and were ready to charge into the flanks of the Raiders line, hopefully putting one of their bands out of the game, but shock horror the dice roll came up short by an inch, leaving them stranded in front of a big pile of angry barbarians!  True to form the first counter from the bag in the next turn was the Noble in charge of the Raiders, who charged and wiped out the remaining cavalry.

First engagement.
There were a few more rounds of combat, with the Shieldwall accumulating huge amounts of shock, but no casualties, while the Raiders suffered casualties and shock, before the raider cavalry were finally finished off, leaving the Scotti Raiders with a Force Moral of 1 and a few groups close to routing. Annoyingly we ran out of time and had to call the game there.
 
The final result was a +3 victory to the British, with light losses on either side.  I used the funds from this success to promote my Lord to a Legatus as well.
 
An interesting game, if extremely frustrating with a lot of key points being decided purely by whomever got the command chit from the bag first, which can be very frustrating.  There was also a fair amount of head scratching about the rules as there are some things that didn't make any sense to us.  I understand the need for a command card for skirmishers and cavalry, but if the have an attached noble why not just let them activate when the noble does? It would solve a great deal of problems with suited cards etc. I may try that as a house rule during a later game and see how it goes. I suspect it will make the game a lot more straightforward, while making cavalry  slightly less powerful due to less ability to remove shock.
 
I still enjoy the game (sort off) but am finding the random element a bit annoying. There were some turns where almost the entire Scotti force had activated before the British got to do anything, and while this is an extreme example it can be very annoying.
 
I am also really struggling with the British Shock cavalry. They are quite powerful but extremely limited as the movement rate of cavalry is pretty variable, making it hard to plan for them and if they don't get the charge then they are pretty much useless. In all my games so far they have just been a liability as I would have been better served having them on foot instead.  That would certainly have been the case here, as the extra staying power in the Shieldwall would have been useful.  Perhaps if I ever get to the stage where I accumulate some extra troops I may swap them out. They may be useful in a few scenarios, but for now I think I will start leaving the horses at home.

Monday, 4 January 2016

First of the Year

As it seems customary, here are my first painted miniatures of the year...

Really rubbish photo I'm afraid. Frostgrave Illusionist and apprentice, along with a random Hasslefree miniature that has been kicking about on the painting table for an age.


Sunday, 3 January 2016

Looking Back

Its almost obligatory to do a blog entry that looks back on the years gaming activity, so here are my reflections of 2015's gaming. 

I will try and break this down into manageable chunks;

In terms of actual games played I did not stray much from my regular Monday night game at Falkirk District Wargames Club.  It is a vibrant club that plays a wide range of games.

By the time you allow for illness and family Holidays etc. I have probably played about 40 or so games this year, but over a wider variety than I would normally do.  Roughly speaking I have played this year:

Sword and Spear
Chain of Command
Dux Britaniarum
Necromunda
Frostgrave
Malifaux
Kings of War
Dungeon Saga
Lord of the Rings
Warhammer Fantasy Battle 3rd Edition
Epic Armageddon
Field of Glory.
X-Wing
Daisho

Fantasy and Sci-Fi still makes up the majority of my gaming, but I think that is largely due to the amount of work involved in putting together a Historical force. I still have my eye on a 15mm Arab type army from the crusades, but have no idea when I will ever get round to it.

I also managed to squeeze in a couple of Board games, playing Pandemic, Forbidden Island and Dungeon Saga.

I quite enjoyed playing a lot of different games but sometimes felt that I was constantly trying to remember rules, which can be frustrating. I feel that games are at their most enjoyable when you know the rules well enough to concentrate on playing the game. 

There have been a few campaigns as well this year, and I participated in a Necromunda, 2 Chain of Command, Dux B and started a fledgling Frostgrave campaign.  This is a good this as campaign are by far my favourite way to play and I am looking forward to joining in a few more in 2016. 

Chain of Command remains probably my favourite game, alongside Epic and Mordheim.  I also enjoyed the few games of Malifaux I played and will look forward to spending a bit more time on that in 2016.

Painting wise this was also a bumper year.  I have no idea exactly how many models I painted but it felt like quite a few. Of the top of my head;

WW2 Germans
About 15 Malifaux Models
About 20 Frostgrave models
40 or so Haradrim Infantry
24 Haradrim Cavalry
2 Oliphants
About 15 or so Goblins fro Otherworld
Otherworld Ogres and Giant
Frostgrave Terrain

I also painted a few models for display only, which was great fun.  This year I also moved over to using a wet palette and to be honest I don't know why I didn't do that years ago as it makes painting a lot easier.  I also discovered my new favourite paints this year as well, from Scale75. They cover extremely well, are great to work with and dry super matte. I have been gradually buying up sets of them and will be phasing out my existing paints as they run out.

It is purchasing that has been the biggest problem. This year the brakes really came off and I went a bit mad. I usually buy for next years big project, with a few smaller distraction on the side to keep things interesting, but this year I seem to have bought enough for about 5 big projects.  This was also the year for kickstarter, with a couple of big ones getting delivered and one other large one due in March.   

In addition to this I purchased an Epic Eldar and Epic Marine army from E-bay, and a Rogue Trader Ork army to use for 2nd edition 40k, so there will be lots to do.

Looking forward to 2016 is looking like a busy year.

I will need to make a decision on a large paiting project, which is looking like it will be Aliens vs Predator. The first batch was delivered just before Christmas and the rest is due in March. I also have the Antenociti Workshop Forward Base Kickstarter to paint and build as well, also purchased with Aliens vs Predator in mind. On top of that I will continue to push ahead with my Fantasy collection, which will get used for both Frostgrave and Otherworld Skirmish.  I have an idea in my head for a series of linked games of  Otherworld Skirmish but will need to paint some more Goblins, and the Westfalia Halfmen when they arrive in March.

In terms of games I want to play, there is a Chain of Command campaign and a Dux B campaign to finish off, plus no doubt some Frostgrave to play as well.  I would like to keep playing some more Epic, and Lord of the Rings, perhaps expanding to the War of the Rings ruleset so I can get all the toys on the table at once. 

The biggest things hobby wise this year seems to have been Frostgrave, which everyone seems to have gone mad for. There are some very creative and inspirational warband being created for this, as it seems to really capture peoples imaginations.  The other big news for me personally was the announced return of Games Workshops Specialist games division. As the only GW game that I actually still like are all specialist games (Epic, Mordheim) plus its continued support for Lord of the Rings has got me very excited.


Monday, 21 December 2015

It's Here!

An early Christmas present arrived today.  

I've been waiting two years for this, and am super excited it has arrived.

It is a very heavy game.   


Lots of work coming up....

Tuesday, 8 December 2015

Nelly the Oliphant

Its been a while since I played any Lord of the Rings, and with this Monday being essentially the last full Monday's gaming at the club this year I decided to break out my Haradrim for nice big battle.
 
I have been acquiring Mumakil from e-bay, were you can pick them up for between 20 and 30 pounds if you look for long enough and now have three. I have spent the year gradually painting them up, along with all of the various other bits needed to get them on the table.
 
Deployment
This scenario was fro the Return of the King book by Games Workshop, but expanded enough to allow for all three Mumakil and all the Haradrrim cavalry, versus most of my Rohan cavalry.
 
The Rohan Force consisted of around 60 cavalry, made up of mostly basic Riders but with some Royal Guard thrown in for good measure. Also present was Eomer, suitable ticked off at the death of his Uncle at the hands of a Nazgul, a couple of other captains and some banners.
 
The Haradrim had three Mumakil, each with 12 archers in the howdah, and 2 of them were commanded by Mahud Chieftains, 18 Cavalry armed with a mixture of lances and bows and 5 Serpent Riders. They were all lead by the Serpent King himself.


In the scenario the Rohan get most of the 3ft by 5ft board to deploy their cavalry on, with the Haradrim being limited to a 1 foot strip down their table edge. The Mumakil would enter the game on turns three and four.
 
The Rohan chose to deploy aggressively, with most of their force deployed within charge distance of the Haradrim deployment. The Haradrrim players deployed all their forces on one flank, neutralising the superior Rohan numbers.  Turns 1 and 2 saw the Rohan charge the Haradrim, but the dice were not kind and they suffered a lot of casualties, while failing to inflict much damage of the Haradrim.
 
At the start of turn three the first two Mumakil arrived on the board, with much fanfare.  Luckily the Rohan had moved out of the way and avoided getting trampled by any but the 34 archers on the backs of the Mumakil made their presence felt and Rohan casualties started to mount sharply. 


Turn three saw a change in the Rohan fortunes, with the evil players all starting to consistently fluff their die rolls.  Everyone was starting to declare heroic moves at this point to desperately avoid the rampaging Mumakil, with the good side generally getting the better of them.  The Haradrrim cavalry were getting a bit thin on the ground by this point as well, and by turn 5 only the serpent king and the three Mumakil were left on the evil side of the board.  The Rohan were starting to run out of troops though and just did not have enough men to do the damage they needed to do to the Mumak.


In turn 6 the Rohan force finally broke, although a lot of them decided to fight on regardless.
The Haradrim decided it might be interesting to start firing at the Rohan engaging the Mumakil into combat, but this tactic did not succeed very well as in one volley Stewart managed to inflict 3 wounds on one of the unfortunate beasts with friendly fire.


BY the time we hit turn 8 their were hardly any Rohan left on the board, and certainly not enough to make any serious impact on the rampaging Oliphant's so we called it a night.
 
All in all an entertaining evening, if a little one sided in the end.  The Rohan objective was to kill the Mumakil, and the best they managed was to reduce one of them down to 2 wounds.  When I run this again I will definitely need to beef up the Rohan a bit, perhaps more men or some more Heroes. It is hard to tell though as the Rohan performed so badly in the first two turns of the game that they were fighting a rearguard action for the rest of the night.  It was good to get all the Oliphant's on the board though!.
 

Tuesday, 1 December 2015

One of those Nights

This week Frazer and decided to give Sword and Spear another try.  I have had a couple of games, but not for a while and barely remembered the rules.

We opted for 500 points and I went for a Late Roman army list, while Frazer went for German Tribes.

Romans are not exactly cheap, so I managed to squeeze the following inot my list:

4 Heavy Armoured Infantry
2 Medium Infantry Archers
2 Armoured Cavalry
1 Cataphract
2 Skirmishers
1 Light Cavalry
Roman Army ready for action.

Frazer's army turned out to be huge:

8 Impact Heavy Infantry
1 Cavalry
2 Light Cavalry
1 Chariot
4 Skirmishers (2 Javelin, 2 Bow)
7 Medium Infantry
A bucketload of hairy barbarians.


He had 19 units to my 12, which was a bit daunting.

I deployed my infantry on my right, with my cavalry in the centre. My plan was to hold my right  while my Cavalry got stuck in, but the plan was going to struggle against so many enemy units.

Sword and Spear has a slightly different turn mechanic.  At the start of the turn each player takes 1 die for each unit in their army and they are all out together in a bag.  In each phase of the game you remove 7 dice, with each player then getting whichever of those dice belong to their side to use for activation.  Those dice are then rolled, and each dice can then be assigned to a unit, providing the dice roll is equal to or higher than the quality of the troops (4+ is ok, 3+ elite and 5+ for rubbish troops).  Troops are then activated using the die scores assigned, starting at the lowest so quality 3 troops can activate before everyone else, and a score a 5 or 6 will go later in the phase.  Every activated units takes its action until they are all completed, and then you remove another 7 dice from the bag and do the same again. You do this until all the dice have been used, which signals the end of the turn.  Then you put them all back and do it again next turn.

The two armies advanced as quickly as possible and not much happened in the first turn. Second turn we were in missile range and started to take some pot shots at each other, with little effect.


Turn 3 and 4 is where it really went pear shaped for the Romans.  It turned out that the Romans were incapable to winning a single combat and got pretty much stuffed. Even the Cataphracts couldn't do any damage to the incredibly tough German tribesmen. 
Roman left flank is wiped out.

By about turn 4 or 5 it was pretty much all over, with the indestructible Germans breaking the Romans without losing a single stand.
Last couple of Roman units left on the table.

Post game discussion involved the seemingly massive difference in cost between the two forces, with German Heavy infantry being as good as the Roman heavies, but almost half the cost.  As it turns out all the infantry points values in the German list were wrong, and Frazer had in fact been playing with over 600 points. This explained the massive difference in the sizes of our armies, although the way the dice went it probably wont have made much of a difference.  We are going to have another bash at this in the new year and se how we get on.

Sword & Spear has some very simple mechanics, but there are a few things that grate somewhat.

The fact that you can only carry out charges one unit at a time can be a but odd, as if your opponent is deployed in a line you need to pick one brave bunch of soldiers to make the first move.

My biggest bugbear is the difference between undrilled and normal troops, as when your forces are stretched from one side of the board to the other not being very manoeuvrable is not much of a problem (at least so far anyway).

However I have only played 3 games so far so need to play a few more to see if these problems will work themselves out with experience. 


Friday, 27 November 2015

July 565AD

July in the Kingdom of Alt Clut saw two sets of raiders try to make away with hard earned British Loot.

The first was a bunch of hairy Saxons from Benaccia. They were trying to raid a village on the border.

Luckily the recently constructed watchtowers helped to warn the British that they were coming.

We rolled for the random placement and deployment, with village being placed in the middle of the board, and the initial British deployment of 3 units was directly opposite the village.
Starting Positions, British on the left. Saxons on the farthest table edge.

The Saxons normally get a D3 moves before the game starts, but thanks to the presence of the watchtowers the British arrived one turn earlier. John rolled a 1 so the Saxons were obviously spotted very early as they did not get any extra moves before the game began.

Early game and John split his force in two, with a noble and 2 units of warriors racing to the village, while the balance of his force headed off to intercept the rather prompt British.

The British were obviously eager to get stuck in as the two groups of warriors managed to get stuck in to the Saxon Hearthguard in turn two. The first turn was inconclusive with some casualties on both sides.

They were obviously a bits shocked by this as in the next turn of combat and about 20 dice needing 4's to hit they fluffed the lot. This resulted in one unit being  wiped out and the other routing away from the Saxons.
They all missed!

And they did it again!


Further to my left my elites had attacked a lone unit of Saxon warriors and inflicted some damage, but exposed themselves to a counter attack from the Saxon Lord and his unit if hearthguard. Miraculously they came out of this rather well, managing to rout the warriors and inflict some damage on the hearthguard.

Late game and the Levies moved on to the board. The Saxons in the village were having a hard time finding any loot, with the first two buildings coming up empty. 
The two commanders have at it.

The pig farmers were obviously out for revenge and all three groups piled on to an isolated group of hearthguard, routing them. The Saxon hearthguard were obviously put of by the smell as the casualties on the levies were minimal. 
Levies show them how its done!

Late game and the Saxons were struggling, although both sides were down to a force moral of 3. 

The British Levies had another go at a second unit of Hearthguard, and thanks to a flank attack bolstered by a few suited cards managed to wipe them out, for very few losses.
To seal the deal the British Elites decided to finish of the fleeing Saxon warriors, which broke the Saxon force, forcing them to flee the field empty handed.
Levies at it again!

A very bloody and quick game, certainly the bloodiest engagement of the campaign so far.  The watchtowers have already proved their worth, as most of the time the raiders have had such a head start that it has been an uphill struggle.

The final results were a +4 victory for the British yielding a Thief's Horde in plunder and an extra two warriors added to the British Forces. The Saxon forces will have to spend a couple of months replenishing their losses.   Now we just need to see of the Picts.